Tag Archives: WIP

Post Moving Ponies

I packed up my horses and hobby stuff around the end of January in preparation for our February move. After we moved, I was busy for a while unpacking, shopping for furniture, and a hundred other little post-moving tasks. But then… I started to get the itch to work on horses. I really missed it.

At that point our only available work surface was the kitchen island, which was also where we prepped and ate meals and a catch-all for household detritus. But I managed to make it work. With most of my supplies still in boxes it was possible to get out the necessary items for a work session and then re-store them away during meals.

kitchen island studio

The kitchen island studio

Last fall I got two new resins that I was very excited to paint- Wee Wyakin, as a trade-commission deal, and Covenant Renewed, as a birthday gift from my parents. I’d bee working on prepping them before we packed up, and I was excited to get them out again.

It was wonderful to be painting again. My Wee Wyakin was destined for a complicated semi-leopard pattern, which is lots of fun to paint. And Covenant Renewed, the Morgan stallion of my dreams, was slated for a deep luscious bay.

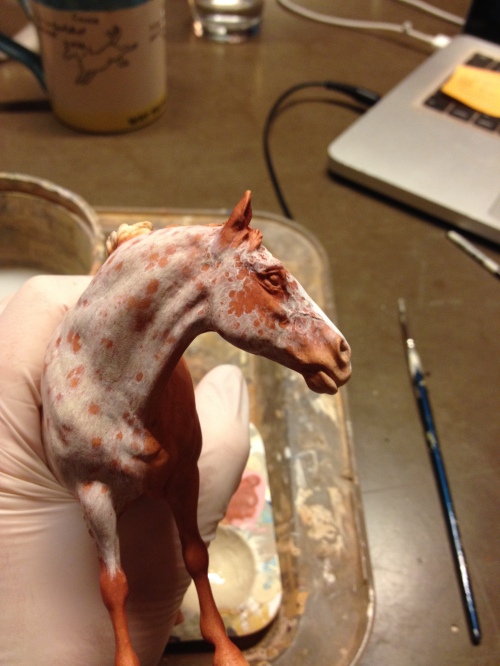
Wee Wyakin (or Pollyanna Plaudit, as she is named) was done in a combination of acrylics, pastel, and pencil, with many, many layers of work.

Pollyanna wip 1

Starting the first layer of hairing and leopard spots

Pollyanna wip 2

Staying safe in the tea cupboard

Pollyanna wip 3

Roaning continues…

Pollyanna wip 5

Starting to look like the references, but far from done.

I had a show coming up in April, and at the last minute (at least, by customizing standards) I decided I could get my Morgan, Salty Captain, done too. I have less photos of his process but he went from funky…

Funky Captain

…to hunky in a matter of weeks.

Beautiful in Bay

Just in time to win his class at NW Expo too!

NW Expo 2014

I’m so happy to have added these two lovelies to my growing resin collection!

Peaceful Pastelling

After what feels like months prepping (actually, I guess it was) I am finally starting to put color on my two resin commissions. The two resins are Justice by Kristina Lucas Francis (the drafter) and Stacey Tumlinson’s mini Majestuoso (the Spanish).

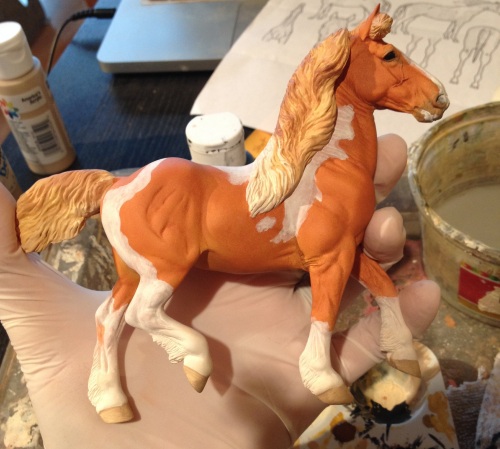
Both horses are artist’s choice colors and they are both going to be chestnut, although very different shades. Justice will be a flaxen chestnut tobiano and Maj will be a deep red chestnut with a hint of metallic shine. At least, that’s the plan!

I am also doing my fourth attempt at a palomino on Chryselephantasia. I did a palomino earlier this year who turned out lovely and was almost effortless… and now this. She is really making me work, but I think I’ve got things right this time.

yellow ponies

The above picture is from a week ago. Chrys was still getting her main body color, and the two resins are getting their yellow-tan undercoats. It was funny working on three yellow horses for a while there.

Since then the two resins have taken a turn toward orangey chestnut.

drafter 12-29-13

As I like to do at about this stage, I also added some basic acrylics so I can start visualizing the finished horse. I blocked in Justice’s tobiano pattern too, so I know where I need to keep going on the chestnut. He’s a bit overly orange right now, but I’m pretty confident in where he’s going.

Majestuoso has a longer way to go, since he’ll be a much darker chestnut.

Maj 12-29-13

Blocking in his dark mane and tail really shows just how far he still needs to go. I love how even just painting the eyes black suddenly brings the horses to life. This guy has a lot of layers left.

Chrys is getting closer and closer- she too got her hair and marking blocked in, and I took the tape off her hooves.

Chrys 12-29-13

At this point I’m only pastelling her greys, and fixing a few boo boos in her coat. Once that’s done, she’ll be getting her whites for real. I’m pleased with how soft her coat came out (finally!) and the super subtle dappling.

I’m so happy to be pastelling again! But I’d better keep up with sculpting and prepping too, so I’ll have a new herd ready for color when these guys are done. I’ve got at least two bays and two appaloosas coming up…


So behind!

Yikes! Can you believe it’s already August? I mean, I can, I just wish it wasn’t. I could use another month to catch up on… everything.

One thing I’m very behind on is blogging. I have a lot of pictures and progress waiting to be shared. The other thing I’m behind on are my goals for the Rose City Live at the beginning of September. Here’s what I’m hoping to get done by then:

  • repair Nightfox’s finish
  • finish acrylic details on Hale resin- and name him!
  • sculpt, cast, and paint a rider for Nightfox
  • prep and paint Chryselephantine 2.0
  • repair and repaint Alpo

WIP herd 8-2-13

And here’s where I am on those goals:

  • Nightfox has some acrylic repair, but needs socking and pastel
  • Hale needs work on his hooves, eyes, and chestnuts. Also a name.
  • The rider is sculpted and awaits casting- more on this later!
  • Chryselephantine is just getting her first layer of acrylic, along with last minute details like veining.
  • Alpo has a new leg but still needs to be sanded and get his tail back on. Plus painting!

So I have a long way to go. Right now I’m waiting for Blick Art to open, so I’m taking the time to catch up the blog on my recent antics! For there are many.

As mentioned above, Chryelephantine is finally getting some paint!

Chrys - acrylic layer

I don’t always do an acrylic layer before pastels, but it can be helpful in speeding up the process. Plus, I’m trying to follow the basic steps I used on an earlier palomino that I really liked, and this is how I started. Also, this light color does a great job of showing last minute blemishes that need to be fixed before I move into pastels.

During this stage, I am also adding last minute details with modeling paste. To show the part of her mane that is shaved (as per Saddlebred show standards) I did a layer of modeling paste along her bridlepath to the forelock, with a bit of shaved-hair texture.

Chrys - bridle path

She also got added veining and some neck wrinkles. Next she’ll get a bunch of socking, and then it’s time to add pastels! I’m really excited to get her in clothes.

Lots more stuff coming… my first adventures in resin casting! Building a full-scale panel jump! General madness! Stay tuned :)

A Short Tale of a Long Tail

With the MEPSA donation horses done and shipped, I’ve turned my attention to preparations for a live show in early September. Of course, by “preparations” I mean all the new stuff I want to have done, not actually preparing for the show…

One of my main goals is to have my Saddlebred mare done. When I last posted about her she was getting close to done but still lacked a tail. Since then I’ve done hours of sanding and refining, resculpted her lower legs for the 3rd time (sigh) and added a tail.

The first thing I did was cover the rest of her in plastic. I have a bad habit of getting epoxy all over my fingers and then all over the otherwise-smooth model, which means more sanding later. I’m trying to avoid that here, using plenty of blue tape and a cut up plastic bag.

Chrys 2.0 tail 01

Next I built up the wire tail with tin foil, secured and stiffened with super glue & baking soda. Once I had the basic shape built, I started to block in the shape with chunks of epoxy.

Chrys 2.0 tail 02

The tail took quite a bit of epoxy. I could maybe have done more with the foil to avoid this, but oh well. It’s funny working in this larger scale- normally I wouldn’t go through that much epoxy in an entire drastic custom!

Chrys 2.0 tail 03

Once the tail was blocked in with the epoxy, and it had dried a bit, I started to add the hair detail. I’m not great at this, but with a lot of shaping and brushing and shaping I got something I was sort of happy with. I use denatured alcohol to smooth all my epoxy including manes and tails. I think I learned that from Jen Buxton who learned it from Tiffany Purdy.

Chrys 2.0 tail 04

After more sanding, primer, and little changes, Chryselephantine 2.0 has a tail!

Chrys 2.0 7-23-13

I’m still working on smoothing and sanding, but she’s getting so close! I’m excited to start adding color.

Rider Redux

I want to improve my performance entries, and one of my steps toward this goal is to add rider dolls. At the mini scale, it’s best to sculpt dolls (as movable parts and fabric aren’t really that scalable). So I set out a few weeks ago to make a rider for Nightfox.

As with many of my projects, the first step with cutting up an OF body with the dremel.

rider 01

Customizing is not for the faint of heart.

I put many of hours in reassembling and resculpting her. She was finally starting to look human… when I realized that really the scale is off. She’s too big for Breyer Stablemates.

With this rider, Nightfox looks like a pony

With this rider, Nightfox looks like a pony

So I said some dirty words, put the rider in the body box, and pulled out a more in-scale victim.

That looks better! Scale-wise, anyway.

That looks better! Scale-wise, anyway.

Once again, step one was all about dismemberment.

nightfox rider 7-9-13

Actually, the second step is about dismemberment too- those legs don’t bend properly around a horse, the arms are straight, and she needs to put her heels down. But I can do that with heat instead of the dremel….bwahahaha.